Tuesday, February 26, 2013

HOW TO: Paint Hall Cabinets

This has been a project, I have been wanting to do ever since we moved in. (it will be 2 years in Aug) Which by the way, was one of the easiest things to paint in my house. Because they are wood and already built in. Less to paint!

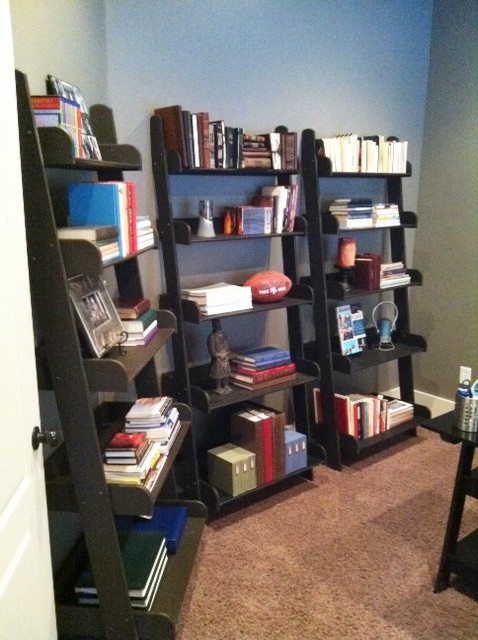
 Here are some BEFORE Pics


After Painting the doors white. Isn't' it a huge difference paint makes? Next up, remove boob light and paint cabinets. BM Kendall Charcoal (my new fave dark gray for cabinets)
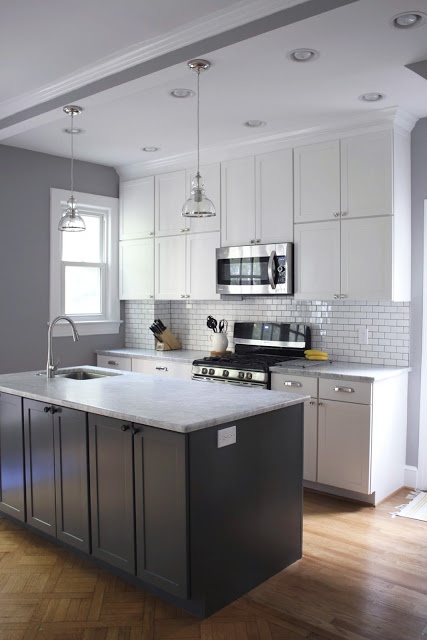

AFTER


We ended up choosing the Ikea bars handles and spray painted them with Rustoleum Gold from Home Depot.


and New Recessed lighting. We added two lights to make the hall even brighter. I love it! Lighting is also HUGE in a space.


Now onto the Easy HOW TO:

1. Wipe down your cabinet doors and wood framing with a warm/soapy dish rag. Getting all the dust and dirt off.

2. They have a Liquid Sanding (my secret ingredient to an easy paint job) now instead of sanding it down with sand paper. Truly genius whoever invented it! I love the stuff. Use it every time before I paint. Anyway, mine is called... "Klean Strip, Easy Liquid Sander Deglosser."
  • use a rag and rub it onto the wood in a circular motion. Give it a few minutes to dry.
3. Then Paint! I use the sponge rollers so it is less stripey. A paint brush leaves stripes when it dries. (on a wall it's fine to touch up, cuz you don't notice it) A sponge roller will make it smooth and beautiful. Like you sprayed it, looking. ;)

* Note. Using a dark color like mine. You only need 1 coat of paint. Which is a added bonus! Plus I painted them right there in the hallway, I didn't remove the drawers at all until we drilled for the new hardware. Truly an easy paint project!

Hope this helps!
Megan

Monday, February 25, 2013

Weekend Project | Organize Pantry

Pantry BEFORE
(Tan paint from prior owner + clutter)


Swiss Coffee Paint makes it feel light and bright. A DIY corkboard frame. Not to mention
 the new IKEA cabinet to hold all 4 kids homework and lunch stuff. 
So it's not on my desk! Woo Hoo, problem solved. 
Thank You Ikea!


Other angle. Moved the brooms behind the door. Ah Much better!


What do you think? Have you guys organized anything lately?

Thursday, February 21, 2013

Monday, February 18, 2013

BM Kendall Charcoal | Color Crush

I am LOVING this color! I just painted my hall cabinets this color, 
and I am so Stoked with the way they turned out! Before and After pics are coming soon. 
It truly is the perfect dark gray without being too dark. 
Ya know?!

Benjamin Moore- Kendall Charcoal 


Wednesday, February 13, 2013

Client Office | Before & After

BEFORE
 (Lots of clutter, and 2 mismatched desks in 1 small office)


AFTER
By floating the desk in the middle it anchors the room. And by moving the shelving to the side 
wall it makes it less heavy feeling in the space.


Styling bookshelves always makes me HAPPY!


My client surprised her husband with this office makeover for his Birthday. His 2 favorite Loves (besides his wife of course) Fly Fishing, and Soccer. 

So why not hang on the wall the unexpected?!


Using only what she had! We really made this office come alive.  Any Utah fans out there. Email me for in home consulting! I promise you won't regret it. ;)

Have you used anything unexpected on the walls before when you decorate?

Tuesday, February 5, 2013

Living Room Design Board | Dreamy Nuetrals

Living Room Design Board
 
Do you have questions about decorating? Or need an E-Design Board for one of your spaces (like this one). I would love to help! Email me for pricing, at megandaly79@gmail.com.


Saturday, February 2, 2013

Living Room DIY Art Project

My Inspiration Art Work

When I first saw this picture, my eye caught that COOL geometric triangle art work on the wall. Image via Little Green Notebook. (One of my fave blogs to visit.)


So anyways,
Then I was thinking I wonder if I can make that?? So I tried it. Knowing it wouldn't cost much. So If I don't like it, no worries. Right?!

HOW TO DIY TRIANGLE ART WORK

1.  Buying the foam poster board. ($2)
2. Cutting down to size with an exacto knife. (which I did a several times)
3. Use a pencil and ruler to trace your triangle shapes.
4. Use a Black sharpie and go over your line.
5. Then Frame it! No glass needed, cuz it's foam board. Just tape it down. (Luckily, I already had the old brown frame)

Easy Right! I love making things beautiful, Inexpensively!


 I really like the way it adds a little modern to the room.


What do you think of my new ART wall?

Friday, February 1, 2013